The current URL is datacrystal.tcrf.net.
Sega Genesis:Rhombus - Getting Started
For this section of the tutorial we will be using the following Open Source Sega Genesis ROMs, which will need to be downloaded in addition to Rhombus. The download links are as follows:
- Rhombus download link
- Atamaurad's 2048 game for the Sega Genesis Direct ROM link GitHub page (MIT license)
Step 1: Starting Rhombus
To run Rhombus in GUI mode, either double-click on the downloaded JAR file, or run it from the command line:
- java -jar rhombus.jar
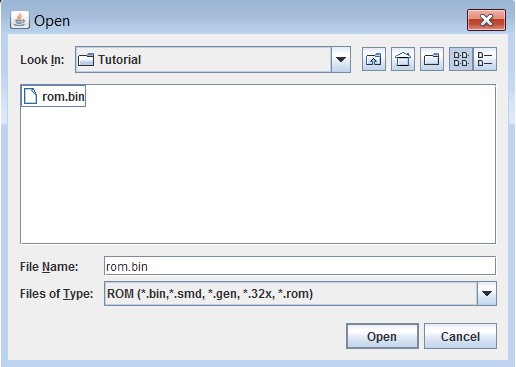
This will bring up a dialog box where you can select the ROM file you wish to disassemble or edit. For Sega Genesis ROMs, you will want to use the "ROM" option. Please select this, then open the downloaded 2048 game file "rom.bin":
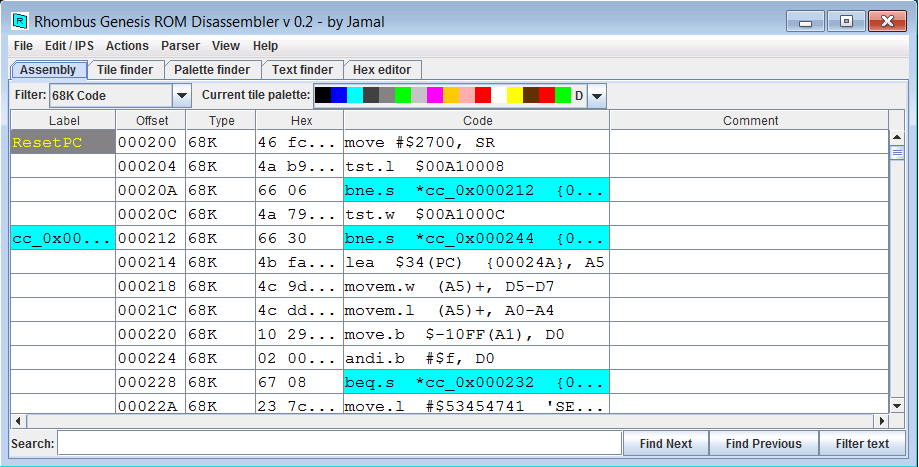
This will open the ROM file in Rhombus and take you to the Assembler view:
Step 2: Disassembly / Determining code flow
When working in 68k ROM mode, Rhombus will read the 68000 vector table at the start of the file and treat each valid entry as an entry point into the code. It will then parse from each code entry point until it reaches either an infinite loop, Return instruction, or indirect branch (i.e. JSR/JMP). This method of disassembly is called "recursive disassembly" or "tracing disassembly" (in contrast to sweep disassembly), and has the disadvantage of separating code from data with good accuracy. However, like sweep disassemblers, indirect jumps are an area where user input is needed.
To handle indirect jumps, you need to look at the code and determine where the next instruction flows. In some cases, this is straightforward (as you will see in the tutorial ROM) and in others it can be more complicated. Some disassemblers do contain automated jump-table detection mechanisms (including Rhombus 0.2a), but to date not even the best jump-table detection algorithms can detect jump tables with 100% accuracy, and so user input and scrutiny is always required.
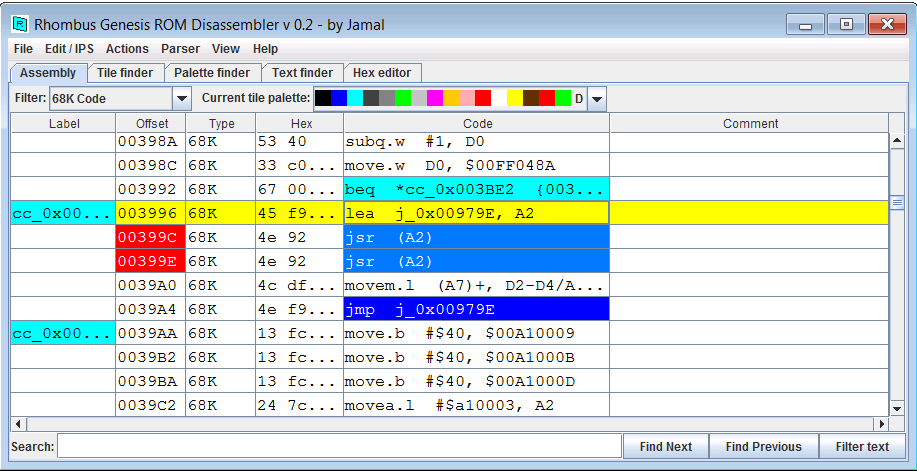
In Rhombus, Indirect Jumps are marked with a red background in the offset column. For our tutorial program, let's first look at the indirect jump "jsr (A2)" at offset 399C. As you can see in the below image, the instruction immediately preceding the indirect jump (at offset 3996) is "lea j_0x00979E, A2", which loads the subroutine's destination address into A2. (Note that j_0x00979E is a default label for offset 979E; the label can be changed to something more descriptive, which is a topic covered in a later section of this tutorial.)
For clarity, before we edit the jump table, please go to the View menu and un-check "Show labels". Now, the instruction will be displayed as "lea $0000979E, A2" instead of using the label.
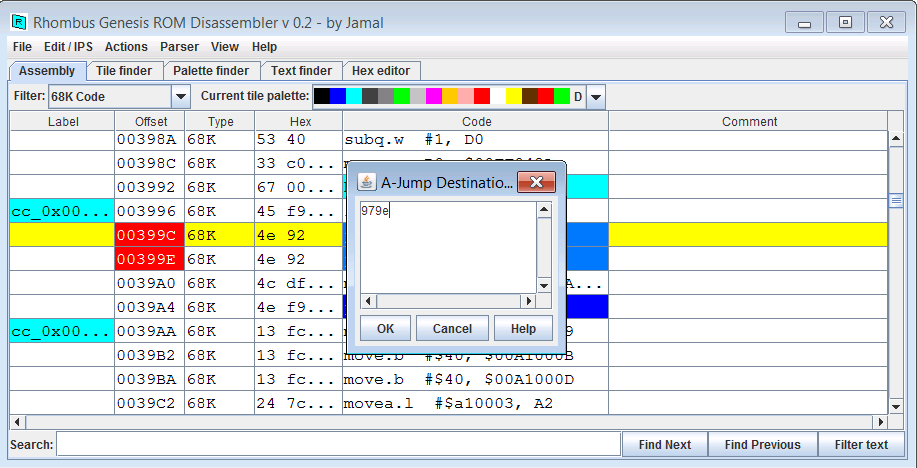
Now, to edit the jump at offset 399C, select that row in the table and then from the Actions menu click "Edit Indirect Jump" (alternatively, you can right click on the row and then select "Edit Indirect Jump"). This will open a window where you can edit the destination(s) for the indirect jump instruction. Enter 979e into the box and click "OK"
This will turn the offset column of the indirect jump blue, and Rhombus will continue parsing at the indirect jump destination. For this indirect jump, not much has changed (since the destination was already parsed due to an direct jump landing there); however, you may notice that the automated label has changed form j_0x00979E to sub_0x00979E. This is because subroutine automated labels take precedence. Next, let's take a look at a jump table:
....... (in progress) .......
Note that some disassemblers like IDA and Ghidra can auto-detect jump tables with reasonable accuracy on 8086 code using different methods, although these methods are not 100% accurate (even in IDA and Ghidra), and so user input and scrutiny is always necessary. Rhombus 0.2a (which is still in development at the time of this writing) is expected to have an auto-detect feature with reasonable accuracy compared with its peers.


